The Complete Countertop Installation Checklist (Before, During & After)
Upgrading your countertops is one of the most transformative investments you can make in your home. A beautifully installed countertop can instantly elevate your kitchen or bathroom, increase property value, improve functionality, and modernize your space in a way few other upgrades can. But a successful project doesn’t happen by accident — it requires proper planning, clear expectations, and a professional installation process from start to finish.
At American Marble & Granite in Tacoma, WA, we specialize in countertop installation, countertop replacement, and custom countertop fabrication and installation for both residential and commercial projects. This comprehensive checklist will guide you through every phase — Before, During, and After installation — so your project is efficient, stress-free, and delivers the long-lasting results you expect.
Before Installation: Planning, Decisions & Preparation
The “before” phase is where homeowners make the most critical choices. The more detailed your planning, the smoother your countertop installation will be.
1. Choose the Right Countertop Material
Your material determines durability, maintenance, budget, and visual style. Here are the most popular options:
• Granite Countertop Installation
A natural stone that is heat-resistant, long-lasting, and ideal for busy kitchens.
• Quartz Countertop Installation
Engineered stone, non-porous, low-maintenance, and perfect for family environments.
• Marble Countertop Installation
Luxurious and timeless, ideal for elegant kitchens, bathrooms, or vanity areas.
• Butcher Block, Concrete & Laminate Options
Warm, rustic, modern, or cost-friendly alternatives depending on your design.
During your countertop installation consultation, your installer should also explain countertop sealing and maintenance, porosity differences, and long-term care expectations.
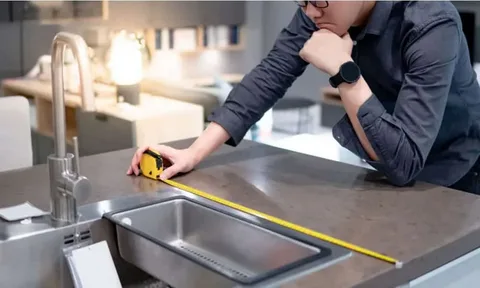
2. Measure, Finalize Layout & Approve Fabrication Details
Accurate measurement is the backbone of a successful installation. This stage includes:
- Confirming all countertop dimensions
- Choosing countertop edge profiles (eased, beveled, ogee, bullnose, etc.)
- Approving sink, faucet, and cooktop cutout locations
- Confirming backsplash height or selecting a backsplash with countertop installation
- Deciding on a waterfall countertop installation if you want a seamless modern design down the cabinet sides
- Reviewing seam placement and slab direction before fabrication
Professional countertop installation services always involve templating, digital measurements, and final homeowner approval before fabrication begins.
3. Understand Your Timeline & Cost Expectations
While every project is unique, homeowners should expect the following:
- Countertop installation timeline: 1–2 days for most homes
- Fabrication: A few days to a few weeks depending on material availability and customization
- Countertop installation cost: Based on material, square footage, edge style, and add-ons (backsplashes, cutouts, waterfall designs, etc.)
Remember: quality craftsmanship is worth more than the cheapest bid. A poorly installed countertop can crack, shift, or cause plumbing issues later — costing far more in the long run.
4. Prepare Your Space Before Installation Day
To ensure installation day goes smoothly:
- Clear countertops and remove items from cabinets
- Create a clear path for installers
- Disconnect plumbing if required (or coordinate with installer)
- Schedule access for any appliances that need to be moved
By the end of the Before Phase, your material, layout, design, schedule, and budget should all be finalized.
During Installation: What to Expect from Start to Finish
This is where your vision finally becomes reality. A professional team will follow a precise countertop installation process to ensure accuracy, stability, and a perfect finish.
1. Removal of Old Surfaces (If Doing Countertop Replacement)
If you are replacing existing countertops, the old surface is removed and inspected. Installers look for:
- Cabinet structural integrity
- Level surfaces
- Water or rot damage
- Plumbing or support adjustments
Strong cabinet support is essential before securing your new countertop.
2. Fabrication, Cutting & Dry-Fitting On-Site
Even when slabs are fabricated in advance, professionals will:
- Dry-fit the countertop to check accuracy
- Level and shim where needed
- Match veins and seams for visual continuity
- Prepare for sink cutouts, cooktop openings, or accessory cutouts
3. Countertop Installation, Bonding & Sealing
Once everything is aligned, the installer will:
- Permanently secure slabs to cabinets
- Bond seams so they are smooth and almost invisible
- Apply countertop sealing (for natural stone surfaces like granite or marble)
- Polish and clean the surface for a flawless finish
A professional installer focuses on clean lines, balanced seams, and long-term stability — because the details are what you will notice for years to come.
After Installation: Inspection, Care & Long-Term Maintenance
Once your new countertop is installed, a few final steps ensure lasting beauty and performance.
1. Final Walkthrough & Warranty Review
Your installer should review:
- Seams and edges
- Leveling and corner alignment
- Polish and surface consistency
- Your countertop installation warranty
This is the time to ask questions about cleaners, sealers, or future care.
2. Reconnect Plumbing, Appliances & Fixtures
Once the countertop is secure, you may need to reconnect:
- Faucets
- Garbage disposals
- Dishwashers
- Sinks and drains
Many homeowners coordinate this with a plumber the same day or next.
3. Follow Countertop Maintenance Best Practices
To protect your investment:
- Use cutting boards
- Avoid placing hot pots directly on stone
- Clean with pH-neutral stone cleaner
- Reseal granite/marble annually (if applicable)
- Avoid harsh chemicals and abrasives
With proper care, high-quality countertops can last decades — and still look stunning.
Quick Homeowner Checklist (Summary Version)
Before:
✔ Choose material
✔ Approve layout and measurements
✔ Prepare access and clear cabinets
During:
✔ Confirm seams, cutouts, and leveling
✔ Approve final aesthetic before bonding
After:
✔ Inspect, reconnect plumbing, and follow maintenance schedule
Transform Your Space with American Marble & Granite
A beautiful countertop should be more than just a work surface — it should be a statement. At American Marble & Granite, we deliver:
✔ Custom countertop installation
✔ Natural and engineered stone options
✔ Countertop fabrication and installation
✔ Residential and commercial craftsmanship
✔ Exceptional quality, durability, and service

