
How to Install Marble: A Step-by-Step Guide for a Perfect Finish
Marble flooring and countertops add a touch of elegance and luxury to any space. However, achieving a flawless installation requires careful planning, the right materials, and proper execution. Whether you’re a DIY enthusiast or hiring a professional, this step-by-step guide will help you understand how to install marble to ensure a beautiful and long-lasting finish.
Table of Contents
Why Choose Marble?
Before diving into the installation process, let’s explore why marble remains a popular choice for homeowners and designers:
✅ Timeless Beauty – Marble’s unique veining patterns create a luxurious and sophisticated look.
✅ Durability – When properly maintained, marble can last for decades.
✅ Adds Property Value – A well-installed marble surface can increase the resale value of your home.
✅ Variety of Styles – Available in different colors, patterns, and finishes to match any decor.
Tools and Materials You’ll Need For Marble Installation
Before you begin, collect these essential tools and materials for a seamless installation.
Tools:
✔ Measuring tape
✔ Level
✔ Notched trowel
✔ Rubber mallet
✔ Wet saw (for cutting marble)
✔ Tile spacers
✔ Grout float
✔ Sponge
Materials:
✔ Marble tiles/slabs
✔ Thin-set mortar
✔ Tile adhesive
✔ Grout
✔ Sealer
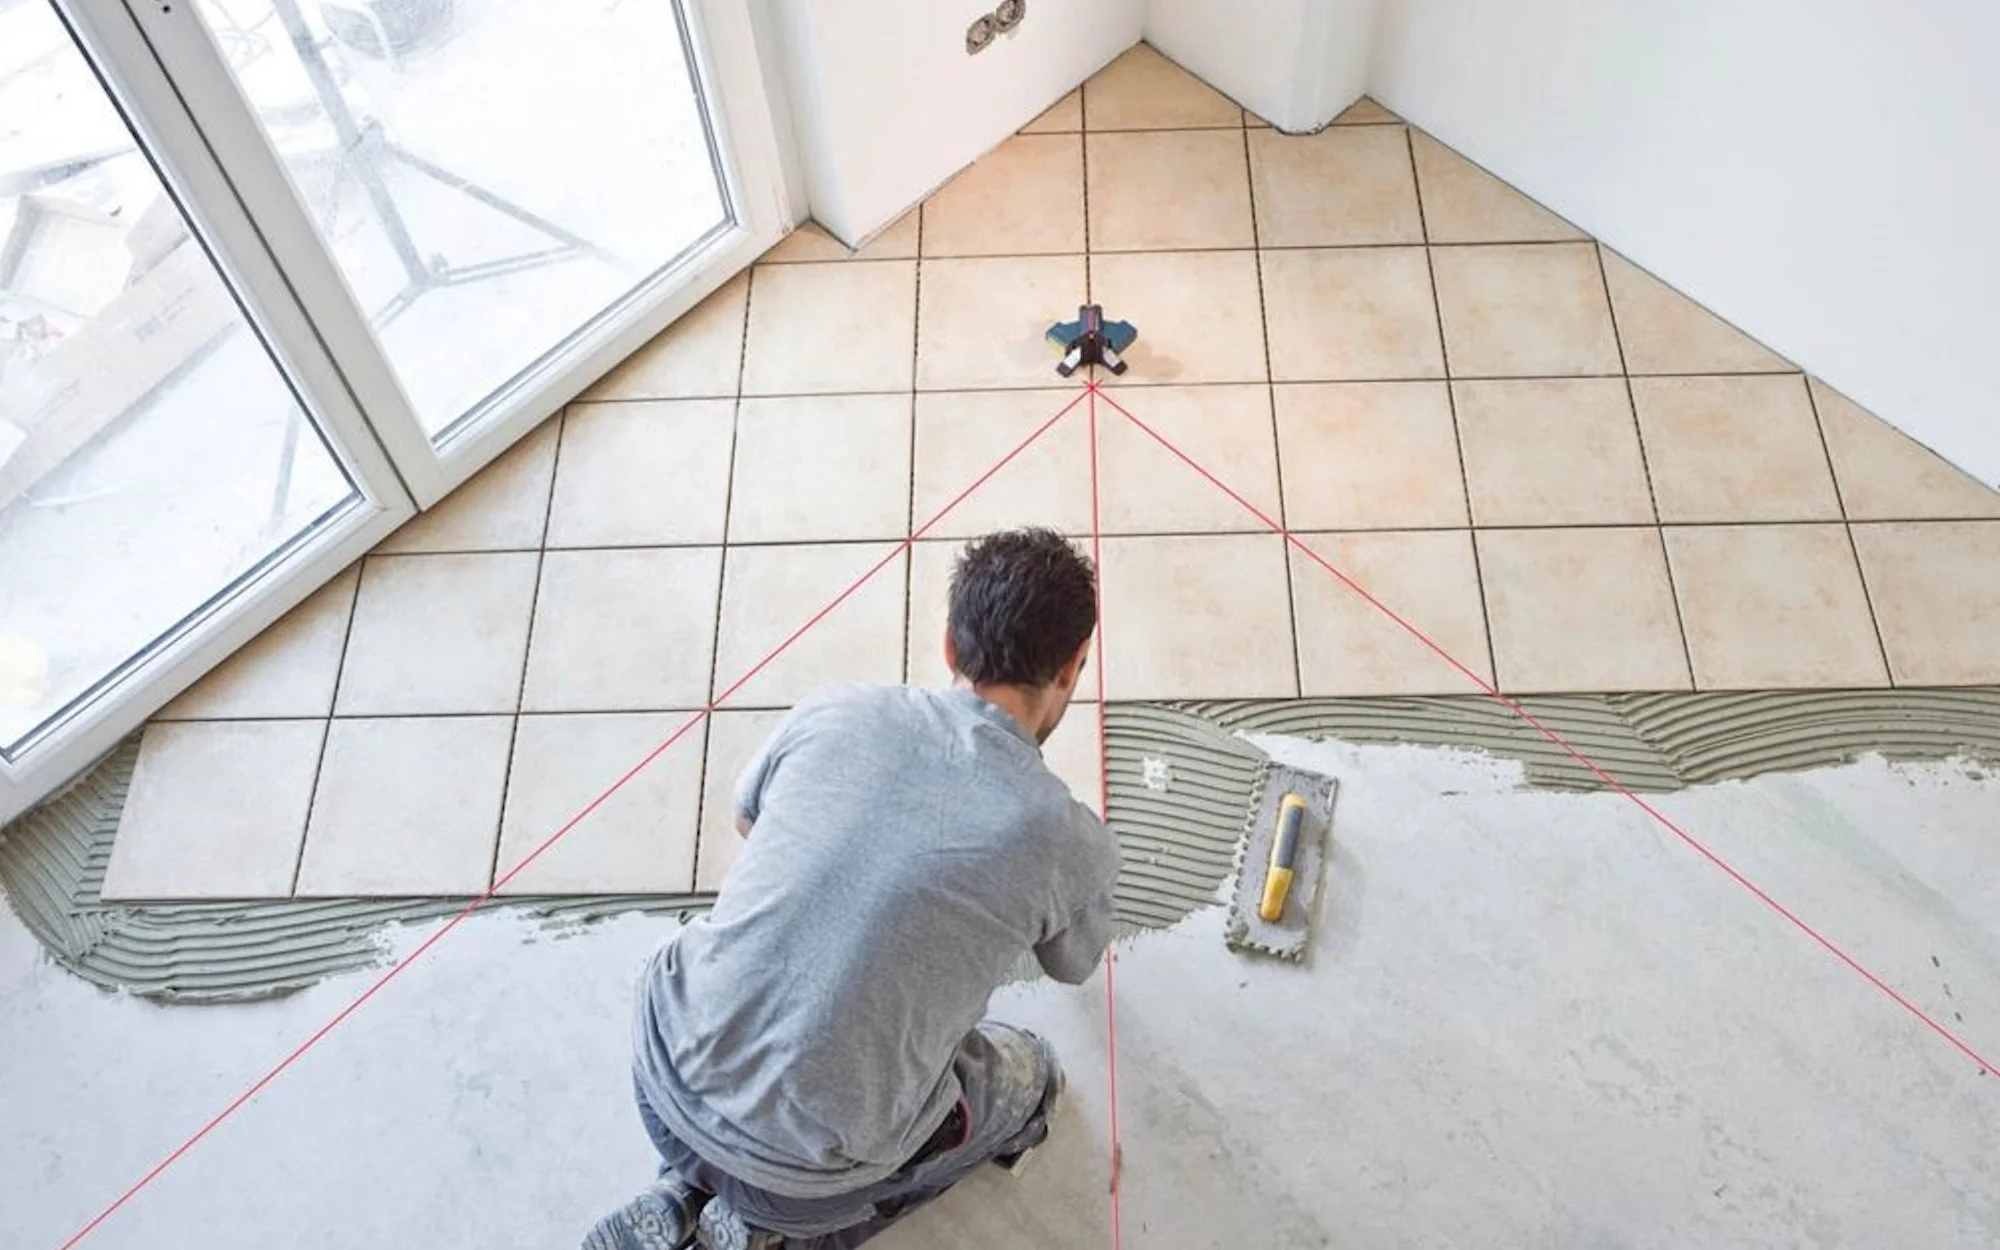
Step 1: Preparing the Surface
The key to a flawless marble installation starts with surface preparation.
1.1 Cleaning and Leveling
Ensure that the surface is clean, dry, and level. Remove any dust, debris, or old flooring materials. If there are any uneven areas, use a leveling compound to create a smooth base.
1.2 Measuring and Planning
Before laying the marble, measure the area and plan the tile layout. Dry-fit the tiles to see how they will look and determine where you might need to cut pieces. This step helps avoid awkward cuts at the edges.
Step 2: Applying the Adhesive
2.1 Choosing the Right Adhesive
Use a high-quality thin-set mortar or tile adhesive suitable for marble. Avoid adhesives that contain high amounts of water, as marble is porous and can absorb moisture, leading to stains.
2.2 Spreading the Mortar
- Apply a thin layer of mortar using a notched trowel, holding it at a 45-degree angle.
- Spread the mortar evenly to ensure a firm grip on the marble.
- Apply the adhesive in small sections to keep it from drying before setting the tiles.
Step 3: Installing Marble Tiles
3.1 Placing the Tiles
- Start laying the marble tiles from the center of the room and move outward.
- Press each tile firmly into the adhesive, slightly twisting it to ensure a strong bond.
- Use tile spacers to maintain even gaps between tiles for grout lines.
3.2 Cutting the Tiles
Use a wet saw to cut tiles that need to fit around edges or corners. Always wear protective gear when cutting marble.
3.3 Tapping into Place
Gently tap the tiles with a rubber mallet to ensure they are level and firmly adhered to the mortar.
Step 4: Grouting the Tiles
4.1 Choosing the Right Grout
Select a grout color that complements the marble. Opt for unsanded grout to prevent scratching the surface.
4.2 Applying the Grout
- Once the adhesive has dried (usually 24 hours), mix and apply grout using a grout float.
- Spread the grout diagonally across the tile joints to fill the spaces evenly.
- Use a damp sponge to remove excess grout before it dries.
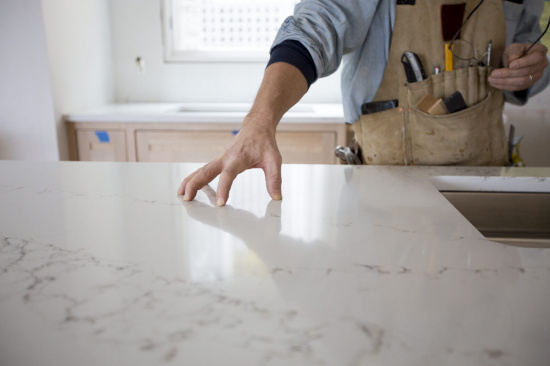
Step 5: Sealing the Marble
Since marble is porous, sealing is essential to protect it from stains and moisture.
5.1 Choosing the Right Sealer
Use a high-quality penetrating sealer designed for natural stone.
5.2 Applying the Sealer
- Allow at least 24 hours after grouting before sealing the surface.
- Use a soft cloth or brush to apply the sealer evenly over the marble surface.
- Allow the sealer to absorb and wipe off any excess.
Step 6: Final Cleaning and Maintenance Tips
6.1 Cleaning After Installation
Once the marble installation is complete, do a final cleaning with a pH-neutral cleaner to remove any grout haze or dust.
6.2 Long-Term Maintenance
✅ Use mild cleaners – Avoid acidic or abrasive cleaners that can damage marble.
✅ Wipe spills immediately – Marble can stain easily, so clean spills quickly.
✅ Re-seal periodically – Apply a fresh coat of sealer every 6-12 months.
✅ Use mats and coasters – Protect surfaces from scratches and water rings.
Common Mistakes to Avoid
🚫 Skipping surface preparation – Leads to uneven tiles and poor adhesion.
🚫 Using the wrong adhesive – Can cause discoloration and weak bonding.
🚫 Not sealing the marble – Leaves it vulnerable to stains and moisture damage.
🚫 Applying too much grout – Can result in a messy finish and make cleaning difficult.
Conclusion
How to install marble is a meticulous process, but with the right tools and techniques, you can achieve a breathtaking finish. Whether you’re upgrading your flooring, countertops, or a statement wall, following these step-by-step instructions ensures a durable and elegant result.
If you’re unsure about any step, consulting a professional can save you time and prevent costly mistakes. Happy tiling!
Explore More : Affordable Countertop Remodeling: Tips for a Stylish Home Upgrade

Joshua Adams
Welcome to my blog! With over 10 years of experience, I specialize in creating engaging content across various niches. I’ve written for American Marble and Granite, focusing on home improvement, countertops, and renovation tips. In this blog, I’ll share expert advice to help you make informed decisions on transforming your home with quality materials and design. Let’s dive into how the right choices can elevate your living space!